This foundation made me write a post after two long years.
As a makeup junkie, I am always on a lookout to try new foundations. I have acne prone skin and large pores, so I need something that helps me to cover the blemishes, texture and discoloration that my monthly breakouts leave behind.
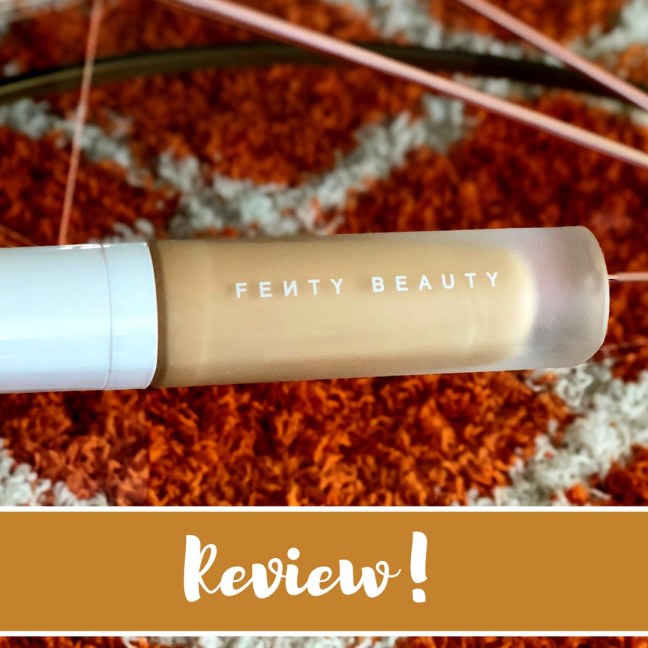
Enter: Fenty Beauty
Since it’s release, all the beauty gurus on Instagram and YouTube have been praising this newly launched makeup collection. So needless to say, I had to get my hands on some of the Fenty products (plus Sephora had their annual spring 15% off sale!). I bought the the Pro Filt’r Matte Longwear Foundation and the Killawatt Highlighter. But this review is strictly about the foundation.
It is THE foundation for you, if:
You want the perfect match for you skin.
Want to save a few extra bucks on high-end foundation.
Love Rihanna.
But it is NOT the foundation for you, if:
You have large pores.
You have texture and acne prone skin.
You want full coverage
You want a long lasting foundation.
It’s a lightweight liquid foundation compared to other formulas that I own like Urban Decay All Nighter Foundation and Hourglass Vanish Stick Foundation. It’s a soft matte formula so it doesn’t leave your skin too matte. It will get a little shiny as the day progresses, and is sadly not sweat proof. Not suitable for summers for sure. The longer it stays on your skin, the more it shifts. There was some serious creasing around my mouth and forehead. But in all honestly that is the case with most full coverage foundations, and it can be remedied by using a primer and a good setting powder (I recommend Laura Mercier).
It is cheaper (comparatively) to other foundations out there. It sells for $34 (Urban Decay is $40 and Hourglass is $46). It’s a steal if you have normal skin and if you wear makeup everyday. You can wear it for light coverage or build it up.
It comes in whooping 40 shades! As an Indian girl, it’s really difficult to find the right foundation for my warm golden undertone brown skin. So I really appreciate the color options. I use shade 290 and it’s absolutely perfect for my skin. It’s a liquid foundation and turns to matte once it sets on the skin. It does oxidize a little once it dries out and gets slightly darker as the day progresses.
Overall: I give it 2.5/5
I’d rather spend a few extra bucks and buy the Urban Decay All Nighter foundation.
Important tips especially for frizzy damaged hair follow….
Ever looked at someone’s hair with jealousy and wondered – Gosh! I wish I had hair like her?
Well, worry not! I have just the tip for you.
When I was a kid, my parents would always chop off my hair in a short bob so that they don’t have to get up and tie them up in pigtails every morning. Talk about being selfish! But when I reached 7th grade. I took up charge of my own hair and by the time I was in high school my hair was long and voluminous.
In college, I experimented with my hair which involved a lot of straightening, curling and blowdrying. It left my hair damaged and lifeless, and I had to cut it short. However, my extremely damaged hair didn’t look very flattering in the short up-do either and I ended up straightening it. Yeah! Adding chemicals to my already damaged hair! Sometimes, I take bad decisions. But it did look good, for a while.
For four long years, I had no other choice but to straighten my hair otherwise it would grow out in weird angles and make me look like an untamed furry animal. But once I finished college, I took charge of my hair and made up my mind to NEVER straighten them again. EVER! My hair had been through a lot and I just didn’t want to be bald by the time I was thirty!
After 1.5 years, my hair has never felt so good. I even gave myself a break and coloured them and I take care of my locks like a baby!
(When I say ‘Straightening’, I mean permanent straightening/smoothening)
Here are the few things I did to grow my hair long and strong, without cutting or straightening them:
1. Overnight Curls
As I said, whenever my hair grew out after straightening, it was always in weird angles. If I were at home, I wouldn’t have bothered doing anything to them at all and let them get over with their awkward stage. I was, however, in the midst of starting my very first internship and I wanted to look presentable if not great! So I followed this little trick – Overnight curls!
These are basically curls you achieve without heat. And no heat means no damage!
There are several ways you can achieve heat less curls. Watch the following YouTube Video by Braidsandstyles12 for more detail:
As you can see, this gives you a great hairstyle without damage! And your hair won’t look like you had a bad flat iron accident either!
2. Deep Conditioning
The number one rule for beautiful hair is deep conditioning. But we all know how expensive most of the spa treatments and products are! I am a middle-class lass and I certainly don’t have hundred of bills to spend on my hair care treatments. So I simply follow the age old trick: Oiling!
As my hair was extremely dry and frizzy especially in the parts that were growing out, I oiled my hair before every wash (at most twice a week). I use a mixture of three oils: Coconut Oil, Almond Oil and Olive Oil. And slather them on my scalp and length till my hair is soaking wet. I follow up with a braid and sleep on it. During times when I am in a rush and need to wash my hair immediately, I just let the oil sit for at least one hour before shampooing.
3. Shampooing and Conditioning
As I mentioned before, I wash and condition my hair twice a week. I used L’Oreal Liss Ultime Shampoo and Conditioner back then. But a cheaper variant would be Dove Damage Repair Shampoo & Conditioner. I shampoo my hair in sections, making sure every inch of the scalp is dandruff free and follow up with a conditioner.
Once again, I condition my hair in sections; finger combing my hair till there are no tangles and till the hair feels extremely soft. I then tie my hair in a bun and let the conditioner sit for a minimum of 5-10 mins before rinsing it all out thoroughly.
Note: I coloured my hair last year and since then I started using Dove Color Rescue Shampoo and Conditioner. Recently, after touching up my hair, I switched to L’Oreal Vitamino Color Shampoo and L’Oreal Absolut Repair Lipidium Conditioner. It is so good and makes my hair feel so so soft. Best part – it smells great!
4. Hair Serum
This is something that I have started doing recently. After my hair is semi-dry post hair wash, I use Fructis Hair Serum for Split Ends and spread it out evenly across my entire hair length. DO NOT use it on your scalp or else you’ll get dandruff. Yikes!
I began doing this after I colored my hair. I know, some of you would be like ‘colouring damages the hair’. That is absolutely correct! However, I coloured my hair only after my hair was in better shape. Plus, I dip dye my hair so that my scalp is chemical free and yet I get the glam look that I so desire. If you take care of your hair religiously, your hair wont feel damaged no matter what you do.
5. Say NO to Hot Tools
Since I followed this routine, I have only used a curler or straightener thrice. I only blow dry it in case of emergencies; for instance when I have to rush out within an hour. I know this is very hard to follow but applying any form of heat on your hair damages it. I mean, have you seen the smoke coming out of your straightener?! *Shivers*
Best would be following the heatless curls routine if you do want the curled look. Or go for a cute braided style instead on your natural locks.
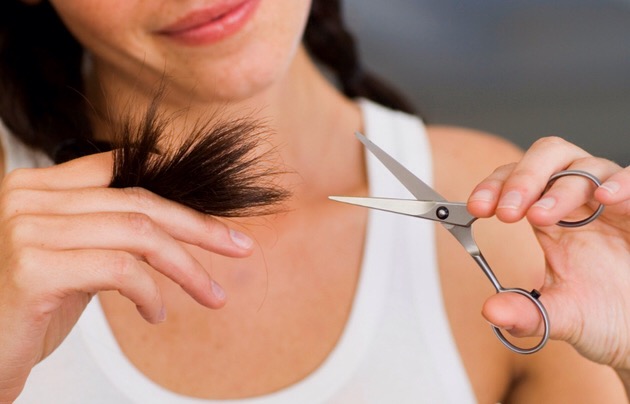
6. Trimming
Yes, trimming your hair on a regular basis is extremely important to keep your hair split-end free. However, I never like going to the salon for the trim as they take away a considerable amount of length to save their own sweet time. Pfsshhh
All I did, was invest in a good pair of manicure scissors and use to it trim my hair weekly. As in, snip away the spilt ends ONLY! Once a month, I cut a small section at the tip of my hair to make it more levelled. This way I don’t loose a lot of length. You don’t have to do it all at once. Just take out your scissors whenever you are free and dig in your hair to find rouge split ends.
So there you have it! Everything I did and still do to save my hair from damage.
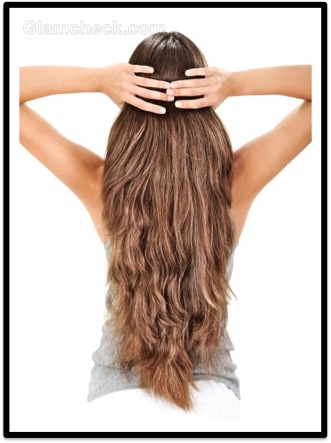
This is the snap shot of how my looked before and how it looks now:
As you can see there is a huge difference between how my hair looked 1.5 years back and how it looks now. My hair is fuller, healthier and longer.
I hope that this post helped you in some way or the other. All I want to say that it’s never too late to start caring for your hair. This is not an extensive or expensive routine. It is something you can do on a tight budget and still give your hair the care that it deserves.
If you try these hair care tips, let me know how it worked out for you. I am open to criticisms as well! And if you have any special hair care tips or tricks that you follow, let me know in the comments and I shall try it myself!
To be honest, I don’t have the best skin in the world. But hey, who does? Also, I am no expert when it comes to make-up and skincare. However, I do try and experiment a lot of DIY beauty stuff on my face. This one little trick is extremely close to my heart as it’s a face mask recipe shared by my Grandma. Plus, it works really well for my skin!
A brief history about my skin type – I have dry-combination acne prone skin. I break out every month around my period and it is oh-so-annoying! But this little face mask helps my skin to restore its earlier glory without any harmful chemicals.
So all you need is:
Gram Flour: 2 TBSP
Turmeric Powder: 1/2 TSP
Milk: 2 TBSP
Rose Water: 2 TBSP
Mix everything together in a bowl to make a thick paste. Make sure that it isn’t watery.
You can use this mixture in two ways:
As a Face Mask: Apply this mixture on your face and let it stay till it’s dry; approximately for 10-15 mins. Then wash your face with lukewarm water, scrubbing it all off in circular motions. Follow up with your regular moisturiser.
As a Face and Body Scrub: Apply this mixture on your face and body, and scrub it gently in circular motions for 5-10 mins. Wash your face with lukewarm water and follow up with a moisturiser.
I do this twice a week and it leaves my skin so SO SOFT! This mixture is extremely beneficial for skin due to its ingredients.
Gram Flour: It is a great exfoliant and in olden days Indian women would use it as a substitute for soap.
Turmeric: Helps to lighten facial hair and get rid of tan.
Milk and Rose water: Makes your skin feel cool, soft and glow-y.
Well, there you have it! A beauty hack that you can create using normal stuff from your kitchen. I hope that you like this post. Please let us know in the comments if you tried this DIY Face Mask/Scrub.
XOXO
Arabella & Jaune
Disclaimer: The DIY mask/scrub may or may not work for some depending on the skin type. The results may vary. It isn’t a full-proof way to get soft skin, just something that we tried and wanted to share with you all.
Being tough while staying stylish is not an easy task
Castle premiered its 7th season on 29th September 2014 and we can’t wait to check out Detective Kate Beckett’s impeccable style this season. Stana Katic who plays the character in the crime series brings out the extra sass while carrying the look. She has brought the character alive with her brilliant acting skills and the wardrobe of a carefree diva. Throughout the past 6 seasons Kate Beckett’s style has undergone major changes. Let’s dissect each look in detail –
Season 1
In the first season, to give justice to her strong feminine personality, Kate Beckett’s hairstyle was short, just slightly below the ears. She donned dark red hair, which complemented her rosy complexion.
Her wardrobe mainly consisted of formal shirts and suits. And boy! Did she carry them off with style! Her clothes were never over-the-top, just simple everyday office wear. However, she didn’t shy away from showing off her bold side for the evening look with bright colors such as red and gold.
She wore normal amount of makeup, sticking to reds and pink hues on her lips. A thin line of eyeliner and mascara with flushed pink cheeks completed the look. Overall, the makeup was to exude a fresh and matte effect.
Season 2
This season was our least favorite Kate Beckett look. Her hair was a bit awkward at the beginning of the season but that swiftly transitioned into straight hair. The shoulder length brown hair with copper highlights looked way better than her not-so-straight-tucked-behind-the-ears hair. We know she is supposed to play a cop and not care too much about her appearance but from the last season, this look went south.
Her clothes became slightly casual. But she continued to stick to her formal wear. Her look changed from bold yet simple to lady-like formal.
Her make up changed drastically this season. She no more went for the rosy complexion look but more of an ever-so-slightly tanned look. She wore nude lip colors and bronzer to highlight her cheek–bones. Eye makeup remained pretty much the same.
Season 3
So Kate Beckett finally gave in to the straight hair look. Hey! We are not complaining! This look was a great improvement over the previous season. Her hair went darker and she sported both straight and wavy look (toward the end of the season). Her complexion was warmer which was perfectly in sync with her brown hair.
On the clothes front, there weren’t many changes besides few additions to her outerwear collection. Few tunics found their way in her closet as well.
The makeup was to achieve a tanned look as mentioned above. Pinkish brown cheeks with neutral lip colors added to her golden glow. She went for thick black eyeliner on the upper eyelids with mascara and brown for the lower lids just along the waterline.
Season 4
She looked absolutely stunning in her new brown hair with blond highlights. Though again she alternated between wavy and straight look, the hair color was the main difference.
Her wardrobe saw a wave of neutral colors such as grey, black, nude, etc. She rarely wore bright colors. We a saw a lot of more trench coats, blazers and leather jackets.
Makeup wise pretty much the same as previous season. Just a bit of a change in her lip colors from nudes to pinks. She loves to keep her lips subtle and draw attention to her eyes. We wonder why as she has the most stunning smile ever!
Season 5 & 6
As seasons 5 & 6 are more of a continuation, Kate’s look didn’t change much. Her hair is now blonder and bouncier, thanks to her voluminous curls. The look is a bit dramatic which makes it even sexier. She stuck to her bold curls throughout the season. Sometimes she tied her hair into a sleek ponytail.
Her wardrobe became more feminine with addition of a lot more colors and fabrics. She wore tunics, satin blouses, pretty dresses, carefree t-shirts, etc. Her style is effortless and you’ll find most of the stuff she wears in your local mall.
Her makeup was mainly focused on her eyes with the smokey-eye look. Tanned skin (due to numerous trips to Hamptons with Castle?) with a bride-to-be glow and nude lips accomplished the sun-kissed look.
Kate Beckett goes through a makeover almost every other season – mainly by changing her hair. Her clothes took time to shift from formal to chic and her makeup matured as her character did through the 6 seasons. But no matter what she wears she always manages to look perfect – even if she is wearing a torn-mustard-stained T-shirt! We can’t wait to explore her new look this season. It will be great that is for sure!
If you want us to cover the look of your favorite star, do let us know. We would love to track their fashion.
As fall is approaching, it’s that time of the year when rompers and mini skirts are being shoved at the back-end of the closet and warm clothes are pulled out. The one look, which stole the season last fall, was the knee-high socks look and we are sure that it is going to make a come back this winter as well. This adorable fashion may seem a bit ‘anime’ but that’s what makes it even cuter! Check it out..
The Classic Black
Just buy the classic black knee-high socks or leggings (i.e. if you like it sheer) and pair them up with oversized sweaters, skirts, dresses, everything! It will keep you warm and fuzzy and make you look super cute.
Go Color!
If your outfit is a bit subtle, just throw in a pair of colorful knee-high tights to make it lively. Bright colors such as orange, purple, green, etc. are sure to rock this season!
Subtle Colors
If you’re not the type of person to go overboard with colors you can even stick to basic black, white and gray; and simply switch between materials. Many stockings and socks come in wool, polyester, lace, fishnet, etc. There are a lot of variants available in the market.
Make it Fun!
Who said socks can’t bring in the fun element? Stripes, polka dots, cat-patterned; there are so many options to choose from! If you are the sorts who loves cute prints, you’ll droll over this category!
The Right Shoes
Make sure you style them with appropriate shoes. Boots are our favorite because they look good with all kinds of socks/leggings. Alternatively you can also opt for stilettoes, pumps or strappy sandals. Whatever looks good!
We hope you enjoyed this week’s HOT or NOT topic. Keep visiting this section for more such looks and latest trends!
If you’re wondering, whether a particular fashion trend is HOT or NOT, do let us know. We would love to do a cover on it!
The thing about being a working-woman is that you don’t have many outfit options to wear at work. You have to be dressed formally and presentably no matter what and NO wild colors allowed. Unless you are working in a job environment, which permits feminine dresses or Indian wear. But we all know offices are quite intolerant when it comes to women’s fashion. This makes our wardrobe quite boring and at times we may find ourselves in a position which every girl is most sorrowfully aware of – the state of having ‘nothing to wear’. However, with simple tips and tricks you can change your formal wardrobe into a wardrobe of a fashionista so that you can strut your stuff on those ‘out-of-office’ occasions. Keep reading to find out how…
Buy some hot shorts
Shorts can bring in the sex appeal to your normal boring shirts/blouses. Wear subtle colors such as denim, black or white lace for daytime and wear the sequined shorts or vibrant colors for those stormy party nights.
Wear a statement necklace
Wear your normal pant and shirt and add a touch of glamour by teaming it up with a statement necklace. It will surely bring in the femininity your outfit so desired.
Skirting the issue
A cute pencil skirt can make your whole outfit alive. You can even wear this combination to work without coming off too informal. So show off your legs and make every other girl jealous of your wardrobe.
Colorful blazers
Blazers in bright colors such as red, green, blue, etc. may not be allowed in some work places but you can definitely wear them at those work lunches with clients on a breezy weekend. You’ll look chic, casual and yet absolutely professional.
A dress shirt
Steal your partner’s over-sized shirt, team it up with a sleek belt and some stockings (Ditch the stockings if you’re feeling bold and if the shirt isn’t too short) and go out for a romantic brunch. Let your hair loose and show them that you know your stuff.
Invest in a good pant-suit
Pant-suits are in vogue this season. From our very own desi girl Priyanka Chopra to Hollywood’s pretty little liar Ashley Benson, everyone is donning this powerful outfit. Pair them up with gladiators or pumps and you’re good to go. Loose the jacket and you’re set for the evening.
We hope you enjoyed reading this post. Give us a thumbs up and share it with your friends.
Don’t forget to give us your feedback by commenting below.
So after being inspired by the Alia Bhatt Ad, I bought the Philips Air Straightener and I have to say that it was one of the most regretful decisions I have ever made so far. The product was certainly not what I thought it to be. How I wish I had bought the old-school flat iron!
I ordered the product on Flipkart and it arrived after 2 days of making the payment (Great Going Flipkart!). The product came in a well-packed Flipkart carton, properly bubble wrapped, et al. Inside there was the product in its original packing as shown in the picture below:
The product comes in two parts, the body (i.e. the dryer) and the paddle brush attachment. The paddle brush is easy to attach and remove. The only thing I liked about this product was that it is an extremely good-looking styler with its black body and gold detailing. However, it does feel a bit cheap and inefficient due to its light-weight. It is even lighter than your standard hair dryer.
The product is easy to use. It has two power modes – low and high, and only one button just like a dryer. In fact, if you use the body without the brush it will act as a dryer.
My experience with the product was not so good. The reasons –
It made my hair extremely frizzy after the use in spite of the fact that the product claims to leave the hair “frizz free” and smooth due to its Kerashine coating (TRUTH: Kerashine and Keratine is a marketing hoax).
It did not straighten my hair at all (again in spite of claiming to be a ‘straightener’). It merely left my wavy hair a little less wavy and not in a good way I must add.
The ‘little less wavy awkward hair-do’ doesn’t last long. The effect wears off within an hour. I don’t like using hair products such as hair sprays and mousse on my hair so I dunno if using these will help to retain the effect.
Other things aside, the main reason I don’t like this product is because of the way it is marketed. If it had been introduced as ‘new improved hair dryer’, I would have loved it. Because it is an extremely easy to use hair dryer and very effective too; but it is definitely NOT a hair straightener. And as my requirement was for a less damaging hair STRAIGHTENER I was left disappointed. For the same amount of money, I could have bought best-in-class flat-iron. Sigh! Now all I have is 3 hair dryers!
Because weddings are a perfect excuse for going all out!
YOMO – You only marry once. At least in India that’s what they say. And on this important occasion of your life you HAVE to look your best (hell better than everyone else in the room!). All eyes MUST be on you or else your wedding will not be such a sweet memory after all. Imagine your best friend looking prettier than you in your wedding album!! HELL NO!
So here are some perfect tips to make you look ravishing and extraordinarily beautiful on your wedding day…
Proper diet and exercise
The wedding preparation for the bride begins a year before the wedding. You need to stay fit and in shape in order to rock the Bollywood bride look. Eat right and exercise daily. DON’T dare to go on one of those stupid juice cleanses. They may help you lose weight but you’ll lose your entire glow and look like an undead zombie. Consult a skin specialist and dietician and they’ll suggest what you should eat and how much should you work out. This is not just for your wedding; it will actually help you to improve your lifestyle.
Grow your hair
You don’t want to be stuck in a bob cut look at your wedding. Chop them off later if you must. But a bride in short hairstyle is a buzz kill. At least grow your hair to a reasonable length so that the extensions won’t look like some 70s hairstyle. Take extra care of your hair and scalp by applying oil (mixture of coconut and olive oil) on your hair at least twice a week for super shiny and conditioned look.
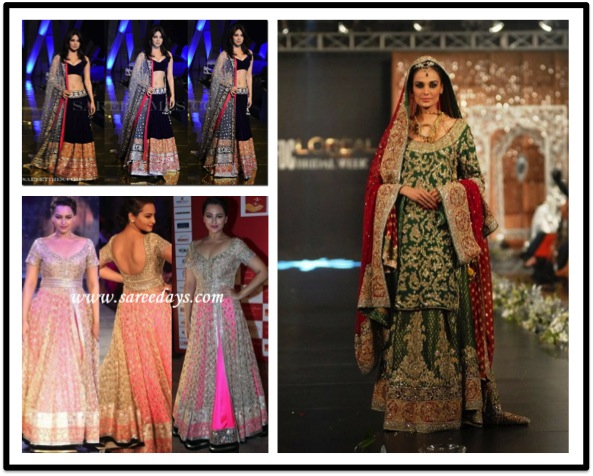
THE lehengas and saaris
To be completely honest, wearing an original designer lehenga is not important. You can actually buy a fake one (as shown in Humpty Sharma Ki Dulhaniya) and look like Kareena Kapoor at half the price. After all it’s just a dress and you are only really going to wear it once (No matter how many times you say that you’ll wear it on Chintu’s wedding).
Make sure you do your research on Pinterest and by following Fashion Week. Make your choices and go on a Fake Lehenga Hunt! Take the picture along and your bargain-expert aunty with you. They are the best!
Groom’s Outfit
Make sure that your outfits are color-coordinated. This is the only day where the color-coordinated clothes are mandatory. Otherwise all your pictures will come out horrible and totally ruin the look! So go for outfit shopping with him if you don’t want him to see your lehengas before the wedding.
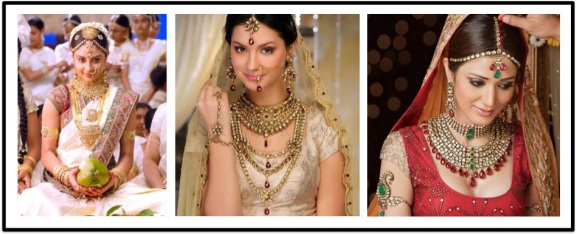
Jewelry
As soon as your outfits are chosen and have found a place in your wardrobe, grab your mum and go for jewelry shopping. It’s completely up to you whether you want to wear ‘real’ jewelry or fake one. Nowadays many brides buy imitation jewelry in order to find a perfect match for their outfits, as gold and kundans don’t always look good with everything. Also the real deal is super expensive. So if you want something lighter on your pocket, there are many shops in Mumbai and Delhi that offer beautiful imitation jewelry to exactly match your outfit. You can customize them to your liking as well.
Shoes
You may wish to go for the drop dead gorgeous ‘highly’ uncomfortable high heels. But I’d say avoid it! Weddings are looooong and you may have to stand in some of the functions for an awfully long time. It’s better to buy something comfortable for such rasams. Anyway, your shoes won’t be visible under your beautiful lehenga/Saari.
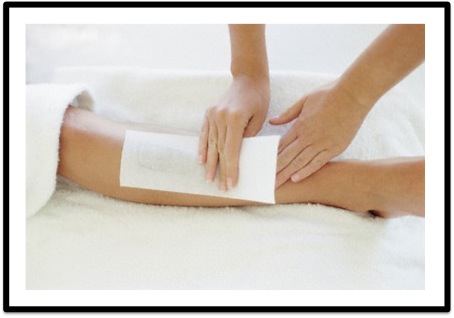
Go hairless
You can do it! Go for a full body wax just 2-3 days before the big day and apply proper lotion to avoid any bumps and rashes on the skin. An olive oil massage will smoothen the skin and make it supple and soft. Go for a spa treat if you’re in the mood.
Make-Up and Hairstyle
Please! Please! Please! Try your make-up artist and hairstylist beforehand. You don’t want to be shocked on your wedding day when you look at yourself with pink eye shadow and bindi wala mang teeka (YIKES!). That’s the worst! Consult your friends and family members and take their recommendation. Make sure to discuss your desired look for the different rasams and try them on to avoid any last minute surprises.
Photographer and Video Artist
This is one of the most important decisions in a wedding. A photographer and video artist are the ones that can either make a time capsule of your most memorable day to revisit again and again or leave a bitter memory behind. You don’t want to look like a zombie or have pictures of people you barely know pushing Gol-Gappas down their throats. Choose the Photographers and Video Artists wisely. Demand to see their previous work if you must and give them specific instructions. Again go over Pinterest for interesting wedding picture ideas.
I hope this checklist helps you in your preparation.
Good luck for your wedding! May you live happily ever after!!
Because there is no excuse for being sloppy, not even when you’re broke.
We all love the dynamic duo in the American sitcom 2 Broke Girls. The season 4 of the show is set to release in the month of October. We surely can’t wait to find out what the fate holds for the two beautiful ladies. The one thing we can’t get enough of besides Kat Dennings wonderful comic timing is Beth Behrs aka Caroline Channing’s fashion sense in the show. She sure knows how to keep it classy. If you want to know how to dress like Caroline Channing then read on…
Colors
Stick to the brown, cream and white hues. Caroline never wears anything too flashy. She loves her subtle colors and we couldn’t agree more.
Casual Outfits
For the casual attire, try high waist-shorts and a cute top. Or go for a more formal look with blazers. You can even wear brown pants and cream/white shirt for the Caroline Channing look. Nowadays, even rompers are in trend; you can try those as well.
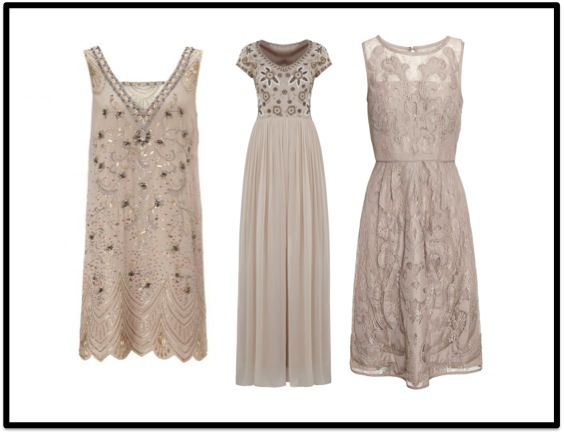
Evening Look
For the evening wear, go for a cute cream dress. Caroline usually wears knee-length dresses. You can even opt for long dresses but make sure that the colors are right.
Accessories
Invest in a good brown handbag and nude shoes that you can team up with anything. For accessories, try pearls and golden necklaces.
Make-up
Go for a nude make-up with dramatic eyes for the evening look. Lips should be bare with just a hint of lip color and gloss. During daytime, matte brown and white eye shadow will get you the Caroline look.
That’s all folks! We hope you enjoyed reading the blog. Please share this and don’t forget to comment below with your suggestions and requests.